CrewAI on Windows
This guide explains how I run CrewAI on Windows, how the environment is set up, and how each agent contributes from content creation to Azure deployment.
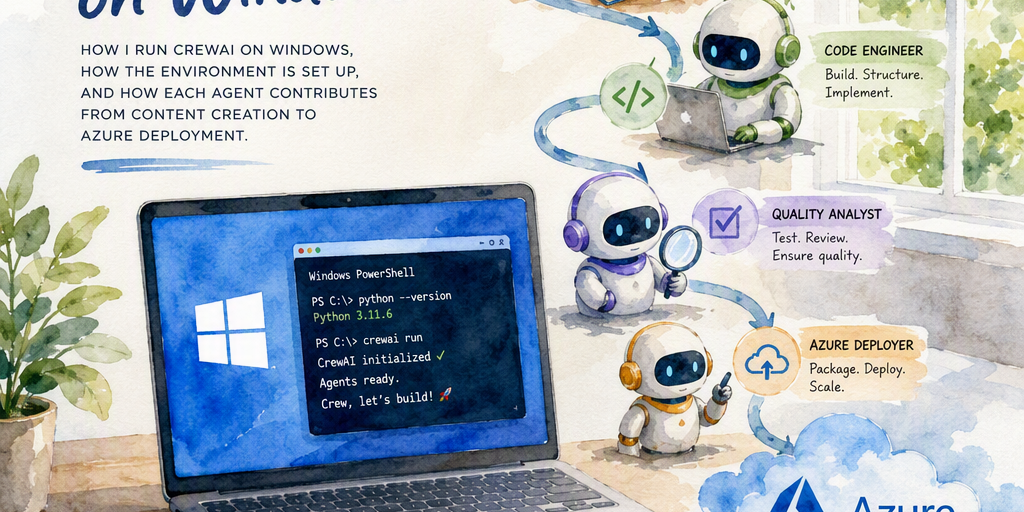
This guide describes a Windows-based CrewAI content pipeline that coordinates research, writing, formatting, review, revision, site generation, and optional Azure Web App deployment. The folder names, command-line flags, metadata headers, configuration fields, and agent sequence are project-specific rather than requirements of CrewAI itself. Confirm them against the project source code and documentation before publishing or adapting this workflow.
1. Windows Setup Overview
The example workflow uses a dedicated Conda environment. A separate environment helps reduce dependency conflicts, but the exact package versions should be defined by the project's requirements file or tested installation procedure.
- Operating system: Windows 10 or Windows 11, subject to the versions supported by the project's Python dependencies.
- Project folder: A local workspace such as NorthernIreland; the name is project-specific.
- Python environment: A Conda environment named agent-crewai in this example.
- Content drop folder: <content-folder>, replacing the placeholder with a directory that the watch process can read.
Before installation, record the versions that the project supports for Python, CrewAI, its model-provider integrations, Azure CLI, Node.js, and any process manager used by the deployment. Do not assume that the latest release of each tool is compatible. The project's environment.yml, requirements.txt, pyproject.toml, package manifest, or deployment documentation should be the source of truth.
Example environment preparation
conda create -n agent-crewai python=<tested-python-version> conda activate agent-crewai python -m pip install -r requirements.txt az versionThe installation command is illustrative. Use the repository's documented setup steps when they differ. Install CrewAI and related packages only at the versions declared or tested by the project.
Authentication and access prerequisites
- Configure the model provider and any required API access using the project's supported environment variables or secret store.
- Install Azure CLI if the workflow publishes to Azure, and sign in with an account that has only the permissions required for the target resource.
- Verify the active tenant, subscription, resource group, and Web App before deploying.
- Keep credentials out of source files, command history, scripts, and JSON configuration committed to version control.
Azure CLI credentials are associated with the local user context and Azure CLI configuration. Reusing an existing login may be convenient, but it is not a substitute for access control. Use least-privilege identities, review cached credentials on shared machines, and sign out or clear the relevant session when appropriate.
2. Project Structure and Configuration
The following structure illustrates the types of files used by this workflow. The actual names and locations must be checked against the repository.
<project-root>/ ├── crew.py ├── requirements.txt ├── azure_webapp_publish_config.json ├── <content-folder>/ ├── generated/ ├── sites/ └── logs/Generated and log directories may have different names or may not exist in every implementation. Confirm where the application writes topic data, rendered pages, deployment packages, and diagnostic output.
Illustrative Azure publish configuration
[ { "site_name": "migrating-workloads-to-azure", "local_path": "<generated-site-folder>", "app_name": "<azure-web-app-name>", "resource_group": "<resource-group-name>", "subscription": "<subscription-id-or-name>" } ]This example documents fields described by the workflow; it does not establish a CrewAI or Azure requirement. The implementation may use a different schema, additional fields, or different matching rules. Validate the file with the project's configuration loader before using it.
3. Execution Modes
Generate or rebuild mode
Batch mode is intended for creating or updating content in a controlled run. It is useful for testing a single topic, rebuilding generated pages, or reviewing changes before deployment.
Watch mode
Watch mode monitors a configured directory for new or updated markdown files. In the described implementation, a detected file can move through metadata parsing, content processing, review, revision, site generation, and optional deployment. Each stage can fail, so watch mode should be accompanied by logs, health checks, and a clear retry or rollback procedure.
4. Agent Roles and Responsibilities
The pipeline uses specialized agents with separate responsibilities. The names and handoff sequence are specific to this project and should be confirmed in the CrewAI crew and task definitions.
Researcher Collects and structures source facts, then prepares topic-oriented context for downstream writing. Writer Converts the research into readable editorial content while balancing clarity, practical value, and audience fit. HTML Formatter Normalizes article output into safe, valid HTML for the site's templates and reduces rendering inconsistencies before review or publication. Reviewer Evaluates quality, completeness, and correctness, then flags weaknesses or requests revisions according to the configured review process. Revisor Applies reviewer feedback and iterates the content within the revision limit configured by the project. Publisher Writes approved output to project files and may trigger a site rebuild for the relevant topic or site. Azure Web App Publisher Packages selected generated content and deploys it to an Azure Web App when deployment is enabled. It may also support dry-run validation and targeted site selection, subject to the implementation.5. Markdown Ingest Flow
In the described configuration, a markdown file placed in the watch directory follows an intended sequence similar to the following:
- Metadata is read from the file. Headers such as Topic and Sub Topic are project-specific and must match the parser's expected names and format.
- The body is converted or sanitized into the HTML structure expected by the site templates.
- Reviewer and revisor tasks run according to the configured limits and task dependencies.
- Topic data is created or updated in the project's JSON or other data store.
- Pages for the relevant topic or site are rebuilt.
- Changed topics are matched to eligible site configuration entries.
- An Azure Web App deployment runs only when publishing is enabled and validation, authentication, matching, and build steps succeed.
This is an intended or configured content-to-deployment flow, not a guarantee that every file reaches production. Validation errors, malformed metadata, missing dependencies, model failures, build errors, unmatched site identifiers, authentication problems, network issues, and deployment failures can interrupt the process. Preserve logs, review generated output, and maintain a rollback or redeployment procedure for production sites.
6. Azure Web App Deployment
Deployment settings depend on the App Service operating system, hosting model, build process, and package contents. A static site can be served through several supported approaches, so linuxFxVersion and appCommandLine should be treated as deployment-specific settings rather than universal requirements.
For one possible Linux App Service arrangement, the project may use a Node.js runtime and a command similar to the following:
linuxFxVersion: NODE|<tested-node-version> appCommandLine: pm2 serve /home/site/wwwroot --no-daemon --spa --port 8080This arrangement requires the selected Node.js runtime and PM2 package or startup mechanism to be available in the deployed environment. If PM2 is not installed or supported by the chosen deployment method, the command will not work. Follow the Azure deployment documentation and the project's tested provisioning method instead.
If a deployed site returns a 404 for a document or client-side route, inspect the deployed file names and paths, the App Service runtime and startup configuration, the SPA fallback behavior, access restrictions, deployment logs, and application logs. Missing runtime or startup settings can contribute to routing failures in some configurations, but they are not the only possible cause and do not necessarily explain every /index.html error.
7. Operational Commands
The following commands reflect the flags described by this project. Confirm that the current crew.py implementation exposes these options before running them.
Continuous watch
conda run -n agent-crewai python crew.py --watch-markdown --markdown-watch-dir <content-folder> --markdown-interval-seconds 30Use a separate, explicitly documented deployment option if watch mode is allowed to publish automatically. Test the workflow without deployment first when introducing a new content source or configuration.
Targeted Web App deployment
conda run -n agent-crewai python crew.py --publish-webapp-sites --azure-webapp-config azure_webapp_publish_config.json --only-site migrating-workloads-to-azureRun a dry run or validation mode when the implementation provides one. Remove or change dry-run behavior only after confirming the selected site, generated files, subscription, resource group, and Web App target.
Homepage branding update
conda run -n agent-crewai python crew.py --site-title "Northern Ireland Explorer" --site-intro "Welcome to Northern Ireland Explorer - stories, places, and practical travel insight."These commands are examples, not general CrewAI commands. Use the project's command-line help to check available options:
conda run -n agent-crewai python crew.py --help8. Reliability, Security, and Troubleshooting
- Check dependencies: Confirm the tested Python, CrewAI, provider SDK, Azure CLI, Node.js, and PM2 versions before investigating application behavior.
- Check file access: Ensure the Windows account running the process can read the content folder and write generated output and logs.
- Check metadata: Compare header names, capitalization, separators, and required values with the parser implementation.
- Check matching: Verify that topic and site identifiers correspond exactly to the publish configuration. A mismatch may result in an intentional skip such as not_selected.
- Check authentication: Run az account show, verify the selected subscription and tenant, and confirm that the identity has the required resource permissions.
- Check build output: Inspect generated files locally before deployment and confirm that paths, entry points, assets, and client-side routes are present.
- Check deployment logs: Review both the local pipeline logs and Azure deployment or application logs when a publish step fails.
- Use controlled releases: Prefer dry runs, targeted deployments, backups, and versioned generated output. Define how to restore the previous known-good site.
- Protect secrets: Use environment variables, managed identities, or a suitable secret store. Do not place API keys, passwords, or access tokens in scripts or configuration files.
With the project-specific settings verified and the failure paths monitored, this Windows-based pipeline provides a modular way to coordinate content production, review, site generation, and optional Azure deployment through CrewAI.
Summary
Practical guidance about CrewAI on Windows.